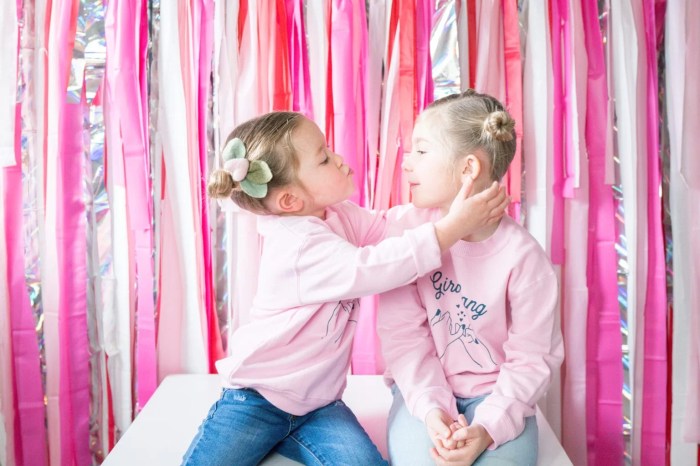
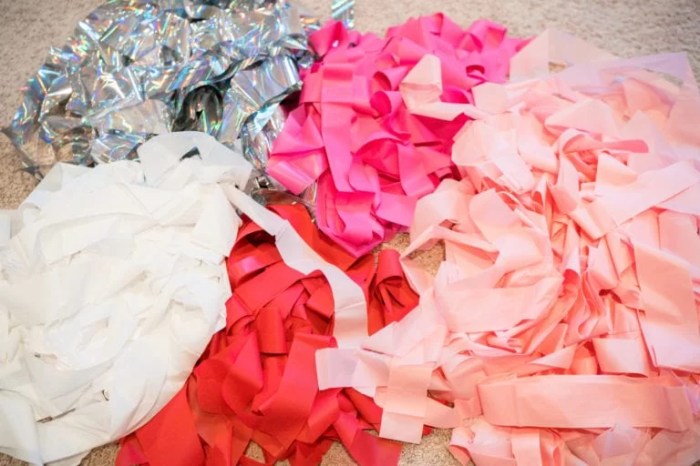
DIY fringe backdrops are a fantastic way to add a touch of whimsy and personality to any event or home decor. Whether you’re hosting a party, creating a photo booth, or simply want to add a unique element to your living space, fringe backdrops offer endless possibilities for creative expression. These vibrant and versatile decorations have evolved from simple fringe trims to elaborate designs, allowing you to customize them to match your specific theme and style.
Table of Contents
The beauty of DIY fringe backdrops lies in their affordability and accessibility. By crafting your own backdrop, you can achieve a personalized look without breaking the bank. This guide will provide you with a comprehensive overview of the materials, techniques, and design inspiration needed to create your own stunning fringe backdrop.
Styling DIY Fringe Backdrops

A fringe backdrop can be a fun and eye-catching addition to any event, whether it’s a birthday party, wedding, or photo shoot. With a little creativity, you can transform a simple fringe backdrop into a stunning visual masterpiece.
Styling Fringe Backdrops with Props, Lighting, and Accessories
Props, lighting, and accessories can elevate a fringe backdrop from ordinary to extraordinary. Consider these ideas to enhance the visual impact:
- Props: Incorporate props that complement the backdrop’s theme. For a tropical vibe, add inflatable palm trees or colorful beach balls. A whimsical party could feature oversized balloons or confetti cannons.
- Lighting: Strategic lighting can transform the backdrop’s appearance. Use string lights to create a warm, inviting glow. For a dramatic effect, try spotlights or colored gels to cast shadows and create interesting patterns.
- Accessories: Accessories can add a touch of personality to the backdrop. Hang garlands, streamers, or even personalized banners. Consider using fabric flowers, ribbons, or other decorative elements to create a cohesive look.
Contrasting Colors, Textures, and Patterns
Playing with contrasting colors, textures, and patterns can create a visually striking and dynamic backdrop.
- Colors: Use contrasting colors to create a bold statement. For example, a backdrop of bright pink fringe could be paired with black or white accents. Or, you could use a gradient of colors, starting with a dark shade at the bottom and gradually transitioning to a lighter shade at the top.
- Textures: Combine different textures to add depth and dimension. For example, a fringe backdrop could be paired with a smooth, velvet fabric or a rough, burlap material.
- Patterns: Incorporate patterns to create a visually interesting backdrop. For example, a backdrop of solid-colored fringe could be paired with patterned fabric or wallpaper. Geometric patterns, floral prints, or even animal prints can add a unique touch.
Incorporating Personal Touches and Themes, Diy fringe backdrop
Personal touches and themes can make a fringe backdrop truly special.
- Personal Touches: Add personal touches that reflect the event or the person being celebrated. For example, a wedding backdrop could feature the couple’s names or wedding date. A birthday backdrop could feature the birthday person’s favorite colors or hobbies.
- Themes: Choose a theme that inspires the backdrop’s design. For example, a “tropical paradise” theme could feature palm trees, pineapples, and bright colors. A “fairy tale” theme could feature whimsical characters, glitter, and soft pastel colors.
Safety and Maintenance

Creating a DIY fringe backdrop is a fun and rewarding project, but it’s important to prioritize safety and proper maintenance to ensure its longevity and prevent any mishaps. This section will guide you through essential safety precautions and maintenance practices to keep your backdrop looking its best.
Safety Precautions
Safety should always be a top priority when working with tools and materials. Here are some key precautions to keep in mind:
- Always use sharp tools, such as scissors or a craft knife, with caution. Cut away from your body and ensure a firm grip to avoid accidental cuts.
- When using adhesives, work in a well-ventilated area to avoid inhaling fumes. Always follow the manufacturer’s instructions regarding drying time and proper application.
- Wear safety glasses to protect your eyes from flying debris or adhesive splashes.
- If working with hot glue, use a heat-resistant mat to protect your work surface and be mindful of the hot glue gun’s temperature.
Storage and Maintenance
Proper storage and maintenance will help preserve your fringe backdrop and keep it looking its best.
- Store the backdrop in a dry, cool, and dust-free environment. Avoid storing it in direct sunlight or humid areas, as this can cause fading or damage.
- If the backdrop is large, consider rolling it up carefully around a cardboard tube to prevent creases and wrinkles. Secure the roll with a ribbon or string.
- If the backdrop is made of delicate materials, avoid folding it to prevent creases. Instead, hang it on a clothes hanger or a backdrop stand when not in use.
Cleaning and Refreshing
Cleaning and refreshing your fringe backdrop will help maintain its appearance and extend its lifespan.
- For light dust or debris, gently brush the backdrop with a soft-bristled brush. Avoid using harsh cleaning agents or scrubbing, as this can damage the fringe.
- If the backdrop is made of washable fabric, you can gently hand wash it in cold water with a mild detergent. Rinse thoroughly and allow it to air dry completely. Avoid machine washing or drying, as this can cause damage.
- If the backdrop is made of delicate materials, consider using a handheld steamer to refresh and remove wrinkles. Be sure to use the steamer on a low setting and hold it a safe distance from the backdrop to avoid damaging the fabric.
From choosing the right fabric and fringe trim to mastering various attachment methods, this guide has equipped you with the knowledge and skills to create eye-catching DIY fringe backdrops. Whether you’re a seasoned crafter or a beginner, the process is both rewarding and enjoyable. So, unleash your creativity, experiment with different colors and textures, and transform your space with the magic of fringe backdrops.
A DIY fringe backdrop is a great way to add a touch of whimsy and texture to any event. The process is simple, involving cutting strips of fabric or yarn and attaching them to a backing, creating a cascading effect. You can use a variety of materials and colors to achieve the desired look. For example, you could use a bright, bold color like the one featured on the estrace website to create a fun and eye-catching backdrop.
The possibilities are endless when it comes to creating a unique and personalized DIY fringe backdrop.


