Audio editor: It’s way more than just cutting and pasting sounds, dude. Think of it as sculpting sonic landscapes, crafting the perfect podcast intro, or even making your own killer beats. From the simple snip of a silence to the complex manipulation of frequencies, audio editors are the unsung heroes of countless audio projects, big and small.
Table of Contents
We’re diving into the world of audio editing, exploring everything from basic functionalities to advanced techniques, so buckle up!
This guide breaks down the core concepts of audio editing, covering different software types, essential features, and workflows. We’ll explore the impact of hardware choices on your sound quality, delve into the nuances of various file formats, and even touch on the legal and ethical considerations that often get overlooked. Whether you’re a total newbie or already messing around with EQ, this guide has something for you.
Defining “Audio Editor”
An audio editor is a software application used to manipulate digital audio recordings. Think of it as a word processor, but for sound instead of text. It allows users to modify, enhance, and combine audio files for various purposes, from simple noise reduction to complex music production. Essentially, it provides a digital workspace for shaping and refining audio.Audio editors offer a range of core functionalities that allow for precise control over audio.
These include recording, playback, editing, mixing, and mastering capabilities. Basic editing functions might involve trimming silence, cutting and pasting sections, and adjusting volume levels. More advanced features often encompass equalization (EQ), compression, reverb, delay, and other effects processing to shape the sonic characteristics of the audio. The ability to work with multiple audio tracks simultaneously is another key feature found in many professional-grade audio editors.
Audio Editor Categories
Different audio editors are categorized based on their approach to audio manipulation. Understanding these categories helps users choose the right tool for their specific needs. The three main categories are linear, non-linear, and multitrack editors. Linear editors, such as older tape-based systems or simpler digital alternatives, work sequentially, meaning edits are destructive and permanently alter the original audio file.
In contrast, non-linear editors operate non-destructively, allowing for edits without directly modifying the original audio data. This enables users to experiment with different versions and easily undo changes. Multitrack editors are a type of non-linear editor specifically designed for working with multiple audio tracks simultaneously, ideal for music production and sound design where layering and mixing are crucial.
Examples of Audio Editing Tasks
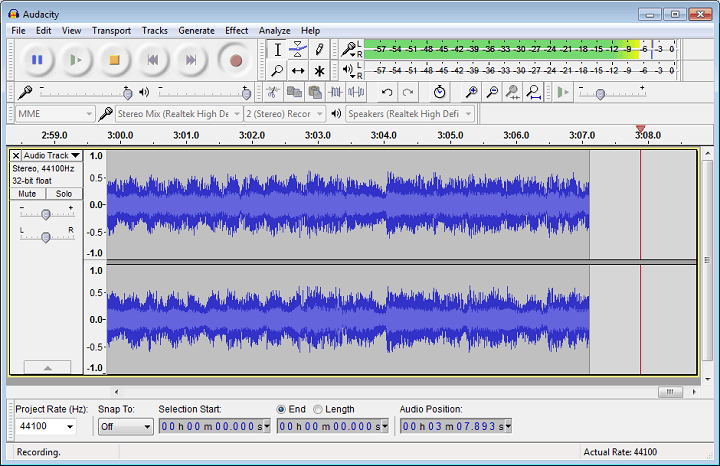
The versatility of audio editors makes them essential tools across various fields. For example, podcasters might use Audacity (a free, open-source non-linear editor) to remove background noise, edit out mistakes, and add intro/outro music. A musician might use a Digital Audio Workstation (DAW) like Ableton Live or Logic Pro X (both multitrack non-linear editors) to record, arrange, mix, and master a song, incorporating various virtual instruments and effects.
A sound engineer working on a film might use Pro Tools (a professional multitrack non-linear editor) to edit dialogue, add sound effects, and create a polished soundscape. Finally, a radio broadcaster might utilize a simpler linear editor for quick edits and on-air announcements. The specific tasks and the choice of software depend heavily on the project’s complexity and the user’s skill level.
Key Features of Audio Editors
Audio editors are indispensable tools for anyone working with sound, from casual podcasters to professional music producers. Their power lies in the combination of features that allow for precise manipulation and creative enhancement of audio files. Understanding these key features is crucial for effectively utilizing these programs and achieving desired results.
Waveform Visualization
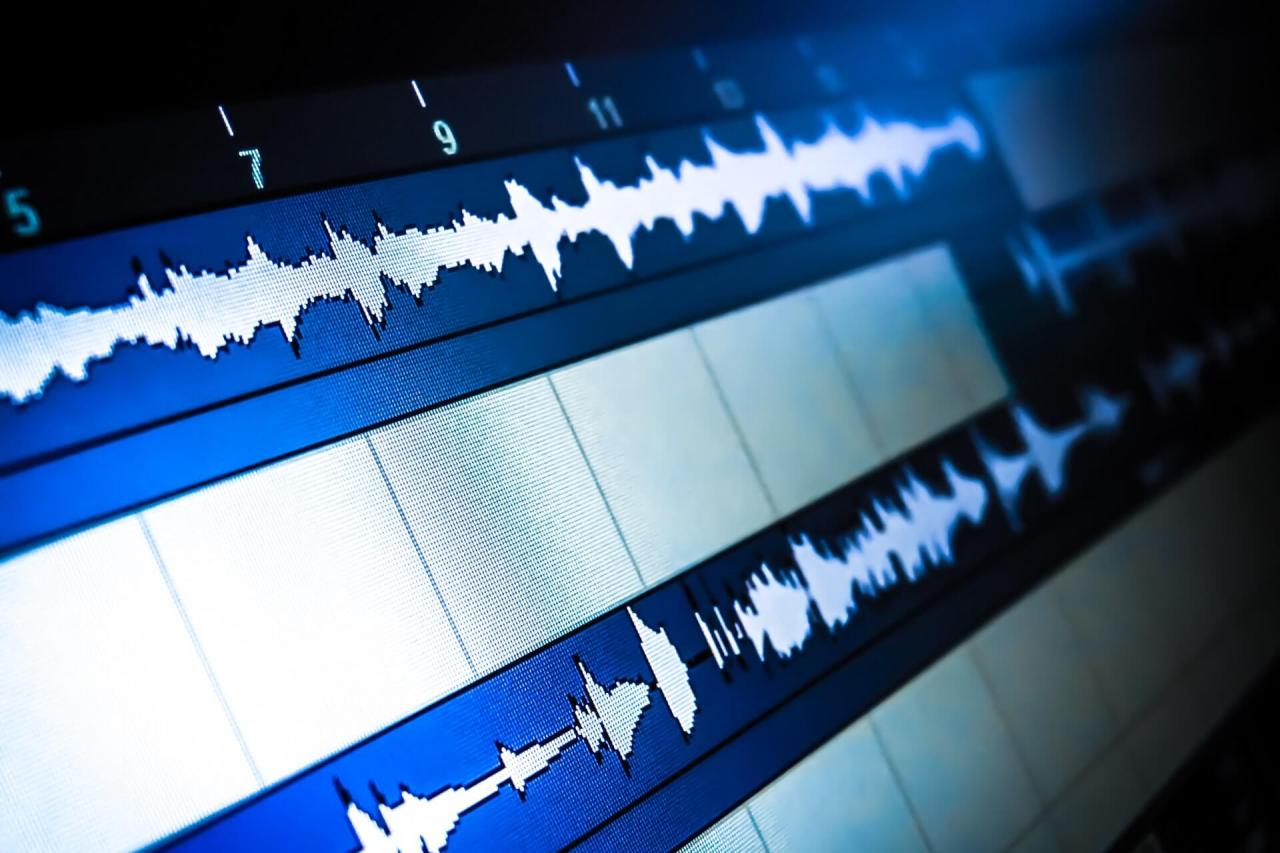
Waveform visualization is absolutely fundamental to audio editing. The visual representation of the audio signal—the waveform—allows editors to see the amplitude and frequency content of the sound over time. This is essential for tasks like identifying and removing unwanted noise, precisely cutting and pasting sections, and applying effects with surgical precision. Without a clear visual representation, editing would be akin to working in the dark, relying solely on your ears which can be deceiving.
For example, a visual inspection can easily reveal a sudden loud pop or a section of consistent low-level hum that might be missed aurally. The waveform provides a roadmap for navigating and manipulating the audio.
Audio Effects
Audio editors offer a wide array of effects that can dramatically alter the sound of audio. These effects are broadly categorized but often overlap in their functionality.
Equalization (EQ): EQ allows you to adjust the balance of different frequencies in the audio. Boosting certain frequencies can enhance clarity or add warmth, while cutting others can reduce muddiness or harshness. For instance, boosting the high frequencies might make vocals clearer, while cutting the low frequencies could remove rumble from a recording.
Compression: Compression reduces the dynamic range of audio, making quiet parts louder and loud parts quieter. This results in a more consistent and punchier sound, often used on vocals or drums. Think of a song where the quiet verses and the loud chorus are brought closer in volume. This is the work of compression.
Reverb: Reverb simulates the acoustic environment of a space, adding depth and ambience to the audio. It creates the impression that the sound is being played in a specific location, such as a concert hall or a small room. A subtle reverb on a vocal track can make it sound more natural and less dry.
Many other effects exist, including delay, chorus, flanger, and distortion, each serving a unique creative or corrective purpose. Mastering the use of these effects is key to professional-sounding audio.
File Format Support
The file formats supported by an audio editor directly impact its versatility and compatibility with other software and hardware. Different formats offer varying levels of compression, audio quality, and metadata support. Common formats include WAV (uncompressed, high quality), MP3 (compressed, widely compatible), AIFF (uncompressed, high quality, common on Macs), and AAC (compressed, efficient). A comprehensive audio editor will support a wide range of formats, ensuring seamless workflow and avoiding conversion headaches.
The ability to import and export in various formats is vital for collaboration and distribution.
Comparison of Audio Editors
| Feature | Audacity | Adobe Audition | Pro Tools |
|---|---|---|---|
| Waveform Editing | Excellent, intuitive | Excellent, advanced features | Excellent, industry-standard |
| Effects Suite | Good, expandable with plugins | Extensive, high-quality effects | Extensive, industry-leading effects |
| File Format Support | Wide range of common formats | Very wide range, including specialized formats | Very wide range, including specialized formats |
| Price | Free, open-source | Subscription-based | High-cost, professional license |
| Target User | Beginners, hobbyists | Intermediate to advanced users | Professional audio engineers |
Workflows in Audio Editing
Audio editing workflows vary wildly depending on the project, but understanding the basic steps involved in common tasks is crucial for efficient and effective production. Whether you’re podcasting, mixing a song, or cleaning up a field recording, mastering the fundamental workflow will significantly improve your results. This section will Artikel the steps involved in three common audio editing scenarios.
Recording and Editing a Simple Podcast Episode
Recording and editing a podcast involves several key steps. First, you need a good quality microphone and recording software. Many free and paid options exist, catering to different needs and budgets. Audacity, GarageBand, and Adobe Audition are just a few popular choices. Once you have your equipment set up, you’ll want to create a quiet, controlled recording environment to minimize background noise.
- Pre-Production: Plan your podcast Artikel, gather any necessary materials (interview guests, music, sound effects), and test your recording setup.
- Recording: Begin recording your podcast episode. Speak clearly and maintain a consistent pace. It’s good practice to record in chunks, allowing for breaks and easier editing later.
- Editing: Import the recording into your audio editor. Remove any mistakes, umms, and ahs. Adjust audio levels to ensure consistency throughout. Add any necessary intro/outro music or sound effects.
- Export: Once the edits are complete, export your podcast episode in a common audio format such as MP3, ensuring a suitable bitrate for high-quality audio without excessive file size.
Mastering a Song in an Audio Editor
Mastering a song is the final stage of audio production, focusing on optimizing the overall sound for various playback systems. It’s distinct from mixing, which focuses on balancing individual tracks. Mastering involves subtle adjustments to achieve a polished and consistent sound across different listening environments.
- Mixing: Before mastering, the individual tracks (vocals, instruments, etc.) need to be mixed. This involves adjusting levels, EQ, compression, and panning to create a balanced and cohesive sound.
- Mastering Prep: Once the mix is finalized, it’s exported as a stereo track. This file is then imported into the mastering software. This often involves gain staging to ensure the audio signal is at an appropriate level for the mastering process.
- Mastering: This stage involves applying subtle EQ, compression, limiting, and other processing techniques to optimize the overall loudness, clarity, and dynamic range. Mastering aims to achieve a polished and consistent sound across various listening devices.
- Export: The mastered track is exported as a high-resolution audio file (e.g., WAV or AIFF) for distribution or further use.
Cleaning Up Background Noise from an Audio Recording
Background noise is a common problem in audio recordings. Fortunately, many audio editors provide tools to reduce or eliminate it. The effectiveness of noise reduction depends on the type and severity of the noise.
- Identify Noise Profile: Select a portion of the recording that contains only background noise. This will serve as a sample for the noise reduction process. Many audio editors have automated tools that will analyze this and identify the noise profile.
- Apply Noise Reduction: Most audio editors offer noise reduction tools, often with adjustable parameters to fine-tune the process. Experiment with different settings to find the best balance between noise reduction and preserving the quality of the main audio.
- Monitor Results: Carefully listen to the processed audio to ensure that the noise reduction is effective without introducing unwanted artifacts or degrading the overall audio quality. It may require multiple passes or adjustments to the settings.
Advanced Techniques
Okay, so you’ve mastered the basics of audio editing – now let’s dive into the really cool stuff. This section covers advanced techniques that’ll take your audio projects from good to professional-grade. We’ll explore automation, plugin use, and efficient project management – skills every serious audio editor needs.
Automation in Audio Editing
Automation is like having a tireless assistant tweaking your audio in real-time. Instead of manually adjusting levels, EQ, or effects throughout a track, you can set up automation clips that smoothly change parameters over time. This is especially useful for creating dynamic soundscapes or subtle shifts in mood. For example, imagine a song that starts quietly, gradually builds in intensity, and then fades out.
You could automate the volume, reverb, and even the EQ to reflect this progression, creating a far more natural and engaging listening experience than manual adjustments would allow. Another great example is automating a compressor’s threshold to control dynamics throughout a vocal performance, automatically managing loud and quiet sections to maintain a consistent level. This allows for more creative control and prevents fatigue from repetitive manual adjustments.
Using Plugins and Extensions
Plugins and extensions are essentially add-ons that significantly expand the capabilities of your audio editor. They provide a wide range of tools, from advanced EQs and compressors to creative effects like reverb, delay, and distortion. Think of them as specialized tools for specific tasks. A good example is using a noise reduction plugin to eliminate unwanted background hiss from a recording.
Another is using a mastering plugin to add final polish and prepare your audio for distribution. These tools dramatically enhance the quality and creative possibilities of your projects. The right plugins can transform a decent recording into something truly exceptional. The sheer variety available means you can tailor your workflow to specific needs, whether it’s achieving a specific sonic signature or tackling complex audio problems.
Managing Large Audio Projects
Working with numerous files and long tracks can quickly become overwhelming. Efficient project management is key to staying organized and productive. This involves employing strategies like using a well-defined folder structure to organize your audio files, meticulously labeling and naming files for easy identification, and leveraging your DAW’s features for session management, like grouping tracks and using color-coding.
Consider using cloud storage solutions to back up your work and facilitate collaboration. For instance, a logical folder structure might include folders for “raw recordings,” “processed tracks,” “effects,” and “final mixes,” further broken down by project name. Properly named files (e.g., “Track_01_Vocals_Final.wav”) drastically reduce search time and confusion. This methodical approach ensures that even the most complex audio projects remain manageable and frustration-free.
Hardware Considerations

So, you’ve got the software down, you’re comfy with the editing workflow, but now it’s time to talk about the tools of the trade: the hardware. The quality of your audio editing, from initial recording to final mastering, hinges heavily on the gear you use. Investing wisely in your hardware will significantly improve your sound and overall workflow.The quality of your audio interface directly impacts your recordings.
A good interface acts as a bridge between your microphones, instruments, and your computer. It converts analog audio signals (what your mics pick up) into digital signals (what your computer understands). Cheap interfaces often introduce noise and distortion, resulting in muddy recordings that are harder to clean up in post-production. Higher-end interfaces, however, boast superior preamps (the first stage of amplification) and better analog-to-digital converters (ADCs), leading to cleaner, clearer recordings with a wider dynamic range.
Think of it like this: a low-end interface is like using a potato to take a picture; a high-end interface is like using a professional DSLR. The difference in image quality is huge, and the same principle applies to audio.
Audio Interface Impact on Recording Quality
Different audio interfaces offer varying levels of performance. Lower-end interfaces, often found in bundled packages with DAW software, may have limited inputs and outputs, lower-quality preamps, and less robust ADCs. This can lead to noticeable noise floor, reduced dynamic range, and a lack of detail in your recordings. Mid-range interfaces offer a significant improvement, providing more inputs/outputs, higher-quality preamps, and better ADCs.
They’re a great stepping stone for serious hobbyists and professionals starting out. High-end interfaces often feature pristine preamps, high-resolution ADCs, and advanced features like MIDI I/O and DSP processing, enabling incredibly clean and detailed recordings. The difference in sound quality between a budget interface and a professional-grade one is substantial, often comparable to the difference between a recording made in a home closet and a professional studio.
High-Quality Headphones for Accurate Audio Editing
Using high-quality headphones is crucial for accurate audio editing. Cheap headphones often have a skewed frequency response, meaning they don’t accurately represent the entire range of audible frequencies. This can lead to poor mixing and mastering decisions, as you’re hearing a distorted version of your audio. High-quality headphones, on the other hand, offer a more neutral and accurate representation of the sound, allowing you to make informed decisions about equalization, compression, and other effects.
They also provide better sound isolation, reducing distractions and enabling you to focus on the finer details of your audio. Think of it like trying to paint a masterpiece with a cheap, dull brush versus a high-quality, finely crafted one – the results will be dramatically different.
Essential Hardware Components for Professional Audio Editing
A professional audio editing setup requires several key components beyond just the interface and headphones. These include a powerful computer with sufficient RAM and processing power to handle demanding audio plugins and large audio files. A fast, reliable storage solution (like an SSD) is also essential for quick loading times and efficient workflow. Furthermore, high-quality microphones tailored to the type of audio being recorded (e.g., condenser mics for vocals, dynamic mics for loud instruments) are necessary for capturing clean, detailed source material.
Finally, a comfortable and ergonomically designed workspace is crucial for long editing sessions. Investing in these components ensures a smooth and efficient workflow, allowing you to focus on the creative aspects of audio editing without being hindered by technical limitations.
Software Choices
Choosing the right audio editing software is crucial, impacting everything from your workflow efficiency to the final quality of your audio projects. The vast landscape of available software can be daunting, so understanding the differences between various options and considering your specific needs is key to making an informed decision. This section will explore the options available, categorized by user experience level and software type.Picking the perfect audio editor hinges on several factors, from your budget and technical skills to the specific types of audio projects you’ll be tackling.
The choice between open-source and commercial software often boils down to a trade-off between cost and features.
Open-Source vs. Commercial Audio Editors
Open-source audio editors, like Audacity, offer a compelling alternative to commercial options. They’re free to use, often boast active communities providing support and plugins, and allow for modification and distribution of the software itself. However, they might lack some of the advanced features or polished user interface found in commercial counterparts. Commercial software, on the other hand, typically offers more comprehensive feature sets, better technical support, and often a more streamlined user experience.
The cost, however, can be a significant factor. Ultimately, the “best” choice depends on your individual needs and priorities. For instance, a beginner might find the ease of use and community support of an open-source option preferable, while a professional might prioritize the advanced features and reliable support of a commercial package.
Audio Editors for Different Skill Levels
Choosing the right software also depends heavily on your experience level.
Here’s a list of audio editors categorized by skill level:
- Beginners: Audacity (open-source), GarageBand (Mac only, free), WavePad (free version available)
- Intermediate: Reaper (commercial, very cost-effective), Cakewalk by BandLab (commercial, free), Adobe Audition (commercial, part of Creative Cloud)
- Advanced: Pro Tools (commercial, industry standard), Logic Pro X (commercial, Mac only), Steinberg Cubase (commercial)
Factors to Consider When Choosing Audio Editing Software
Several key factors should influence your software selection:
- Budget: Open-source options are free, while commercial software ranges from affordable to very expensive.
- Operating System Compatibility: Ensure the software is compatible with your computer’s operating system (Windows, macOS, Linux).
- Feature Set: Consider the features you need, such as multitrack editing, mastering tools, noise reduction, and effects processing. Advanced users will require more sophisticated features.
- User Interface: A user-friendly interface is crucial, especially for beginners. Explore software demos or tutorials to get a feel for the workflow.
- Technical Support: Commercial software typically offers better technical support than open-source options. Consider the level of support available if you anticipate needing assistance.
- Community Support: Active online communities can be invaluable resources for troubleshooting and learning new techniques. Open-source software often benefits from strong community support.
- Integration with Other Software: Consider whether the software integrates well with other tools you use, such as DAWs or video editing software.
Audio File Formats
Choosing the right audio file format is crucial in audio editing, impacting file size, audio quality, and compatibility with different software and devices. Understanding the characteristics of various formats allows for informed decisions throughout the editing process, optimizing workflow and ensuring the final product meets specific needs.
Different audio file formats employ different compression techniques, resulting in varying levels of file size and audio quality. Lossless formats preserve all the original audio data, while lossy formats discard some data to achieve smaller file sizes. The choice depends on the balance between storage space, transmission bandwidth, and the desired fidelity.
WAV Files
WAV (Waveform Audio File Format) is an uncompressed audio format, meaning it retains all the original audio data. This results in high-fidelity audio, making it ideal for professional applications where preserving audio quality is paramount, such as mastering and archiving. However, the lack of compression leads to significantly larger file sizes compared to compressed formats. WAV files are commonly used in professional audio studios and for high-quality audio playback.
MP3 Files
MP3 (MPEG Audio Layer III) is a lossy compressed format, meaning some audio data is discarded during compression to reduce file size. This makes MP3 files significantly smaller than WAV files, making them suitable for online streaming, portable music players, and general audio distribution. While the reduction in file size is advantageous, the compression process can result in some loss of audio quality, particularly noticeable at higher compression ratios.
The trade-off between file size and audio quality is a key consideration when using MP3.
FLAC Files
FLAC (Free Lossless Audio Codec) is a lossless compressed format, offering a balance between file size and audio quality. Unlike MP3, FLAC preserves all the original audio data during compression, resulting in high-fidelity audio comparable to WAV. However, FLAC files are larger than MP3 files, though smaller than uncompressed WAV files. This makes FLAC a popular choice for archiving high-quality audio and for situations where preserving audio fidelity is crucial without the extreme file sizes of WAV.
Lossy vs. Lossless Compression
Lossy compression, exemplified by MP3, permanently removes audio data deemed less important to the human ear. This results in smaller files but sacrifices audio fidelity. Lossless compression, such as FLAC, uses algorithms to reduce file size without discarding any data. This preserves the original audio quality but results in larger files. The choice depends on the priority: smaller file size or perfect audio reproduction.
For instance, streaming services prioritize smaller file sizes for efficient delivery, while archiving valuable audio recordings often favors lossless compression to maintain the highest possible quality.
Audio File Conversion
Converting between audio file formats often involves using dedicated software or online converters. The process generally involves encoding the audio data from the source format into the target format. For example, converting a WAV file to MP3 involves encoding the uncompressed WAV data using an MP3 encoder, which applies lossy compression to reduce the file size. Conversely, converting an MP3 to WAV involves decoding the compressed MP3 data and storing it in the uncompressed WAV format.
Software like Audacity, Adobe Audition, and many online converters offer this functionality, often allowing for adjustments to the encoding parameters, such as bitrate and sample rate, to fine-tune the balance between file size and audio quality.
Troubleshooting Common Issues
So, you’ve dived into the world of audio editing, mastered the basics, and maybe even dabbled in some advanced techniques. But even seasoned pros run into snags. This section covers some common audio editing problems, how to fix them, and, more importantly, how to prevent them from happening in the first place. Think of it as your audio editing first-aid kit.
Audio editing, while creatively fulfilling, can be technically challenging. Understanding the root causes of common problems is key to efficient workflow and achieving a polished final product. This section provides practical solutions and preventative measures to streamline your audio editing process.
Clipping
Clipping occurs when the audio signal exceeds the maximum amplitude your recording software or hardware can handle. This results in a harsh, distorted sound, permanently damaging the audio. Think of it like trying to pour more water into a glass that’s already full – it spills over. The visual representation of clipping on a waveform shows the signal abruptly “clipped” at the top or bottom, resulting in a flat line.
This is a serious issue because you can’t recover the lost audio information.
To fix clipping, you’ll need to reduce the gain (volume) of the affected audio. You might need to use a compressor to reduce the dynamic range or even re-record the audio at a lower level. Prevention is far better than cure: Always monitor your input levels carefully using a VU meter or peak meter within your DAW (Digital Audio Workstation).
Make sure the levels stay well below the 0dBFS (decibels relative to full scale) threshold. Leave headroom; aim for peak levels around -6dBFS to -12dBFS for safety.
Noise
Noise is any unwanted sound that interferes with your recording. This can include background hum, hiss, crackle, or even the sound of your computer’s fan. These noises can range from subtle to extremely distracting. The sources are varied and include the recording environment, the microphone, and the recording equipment itself.
Solutions for noise range from simple to complex. Simple noise reduction plugins can often attenuate background hum. More sophisticated techniques like spectral editing allow you to visually identify and remove specific frequencies of noise. For more pervasive noise, noise reduction plugins using a noise print (a sample of the unwanted noise) can effectively remove it. Prevention involves choosing a quiet recording environment, using high-quality microphones and equipment, and employing proper microphone techniques.
Consider using a pop filter to reduce plosives (hard consonant sounds) and a windscreen to minimize wind noise.
Latency
Latency is the delay between when you play a sound and when it’s heard. This delay can be incredibly frustrating, especially when playing instruments or recording live performances. It’s caused by various factors, including the processing power of your computer, the audio interface, and the software you’re using. High latency makes real-time recording and playback extremely difficult and can lead to timing errors.
Fixing latency usually involves optimizing your computer’s performance. Closing unnecessary programs, upgrading your RAM, or using a more powerful computer can help significantly. Adjusting buffer sizes within your DAW can also impact latency. A lower buffer size reduces latency but increases the load on your CPU, potentially leading to dropouts. Finding the sweet spot requires experimentation.
Using a dedicated audio interface with low latency drivers is also a key preventative measure.
Legal and Ethical Considerations
Navigating the world of audio editing involves more than just mastering software; it requires a solid understanding of copyright law and ethical practices. Using someone else’s audio without permission can lead to serious legal trouble and damage your reputation. This section will explore the key legal and ethical considerations you need to be aware of.Copyright and licensing are crucial aspects of audio usage.
Essentially, copyright protects original creative works, including music, sound effects, and even unique voice recordings. Using copyrighted material without permission is infringement, potentially leading to lawsuits and hefty fines. Licensing, on the other hand, grants permission to use copyrighted material under specific terms and conditions, often involving payment or attribution. Understanding the differences is key to avoiding legal pitfalls.
Copyright Infringement and Licensing, Audio editor
Understanding copyright infringement is paramount. Simply put, it’s the unauthorized use of copyrighted material. This includes using a song in your podcast without a license, sampling a sound effect from a video game without permission, or even using a snippet of someone’s speech without their consent. The penalties for copyright infringement can be severe, ranging from cease-and-desist letters to expensive lawsuits.
Conversely, obtaining a license allows you to legally use copyrighted material, often with specific stipulations regarding how, where, and for how long you can use it. Creative Commons licenses offer a more flexible alternative, providing different levels of permission for using copyrighted works. For example, a Creative Commons Attribution license might require you to credit the original creator, while a Creative Commons NonCommercial license might prohibit commercial use.
Always carefully review the terms of any license before using the material.
Obtaining Permissions for Copyrighted Material
Securing the necessary permissions is a critical step. This usually involves contacting the copyright holder (the individual or organization that owns the rights to the audio) and requesting permission to use their work. This often requires a formal request, potentially involving a written agreement outlining the terms of use, including payment, usage restrictions, and attribution requirements. For music, you’ll typically need to obtain a mechanical license to reproduce and distribute the music and a synchronization license if you’re using it in a video.
Sites like Harry Fox Agency (HFA) and other music licensing services can assist in this process. For other types of audio, directly contacting the creator or their representative is often necessary. Always keep detailed records of all permissions obtained, including correspondence and agreements.
Ethical Considerations in Audio Editing
Beyond legal considerations, ethical practices are paramount. This encompasses several aspects, including transparency and honesty. For instance, if you’re editing a podcast interview, you have an ethical responsibility to ensure the conversation isn’t manipulated to misrepresent the interviewee’s statements. Similarly, when editing audio for a video, it’s crucial to avoid using audio in a way that deceives or manipulates the viewer.
Adding or removing sounds to intentionally mislead the audience is ethically questionable, even if it’s not illegal. Transparency is key; clearly indicating any edits made to audio is an important ethical consideration, especially in journalistic or documentary contexts. Maintaining the integrity of the original audio and respecting the creator’s intent are also important ethical principles to consider.
Future Trends in Audio Editing
The audio editing landscape is rapidly evolving, driven by advancements in artificial intelligence, machine learning, and increasingly powerful hardware. These changes are not only making audio editing more efficient and accessible but also opening up exciting new creative possibilities for both professionals and amateurs. We’re moving beyond simple cut-and-paste operations towards a future where AI assists in every stage of the process, from initial recording to final mastering.AI and machine learning are poised to revolutionize several aspects of audio editing.
These technologies are already being incorporated into software to automate tedious tasks, improve audio quality, and even create entirely new soundscapes. The impact is profound, promising to democratize access to professional-level audio editing capabilities.
AI-Powered Audio Enhancement
AI algorithms are becoming increasingly sophisticated in their ability to enhance audio quality. For instance, noise reduction tools are now capable of identifying and removing specific types of noise with greater precision and less impact on the desired audio. Similar advancements are being made in areas like de-clipping, which recovers audio signals that have been distorted by clipping, and spectral repair, which fills in gaps or imperfections in audio recordings.
Imagine a tool that automatically identifies and removes background chatter from a recording of a live performance, leaving only the crisp, clear sound of the instruments and vocals – this is becoming a reality. This technology represents a significant leap forward in efficiency, allowing editors to spend less time on tedious cleanup and more time on creative work.
Evolution of Audio Editing Software
Future audio editing software will likely be characterized by more intuitive interfaces, enhanced AI integration, and collaborative features. We can anticipate software that adapts to the user’s skill level, providing helpful guidance for beginners while offering advanced tools and customization options for experienced editors. Cloud-based collaboration tools will become increasingly common, allowing multiple editors to work on the same project simultaneously, regardless of their geographical location.
This parallels the evolution of other creative software, reflecting a move towards seamless teamwork and shared workflows. Software like Adobe Audition already incorporates some AI features, pointing the way towards more sophisticated applications of the technology in the future.
So, I’m totally into audio editing right now, trying to get that perfect mix. It’s all about precision, kinda like how you need precision when designing a bathroom in sketch up , right? Anyway, back to audio, I’m experimenting with different plugins to get the right sound – it’s a seriously fun process!
Next-Generation Audio File Formats and Compression
Current lossy compression techniques, like MP3, offer a balance between file size and audio quality, but they still involve data loss. Future formats may leverage advancements in AI and machine learning to achieve even higher compression ratios with minimal or even no perceptible loss in quality. This could be achieved through more efficient encoding algorithms that better model the characteristics of human hearing.
We might see the rise of new formats that are optimized for specific applications, such as immersive audio experiences or high-fidelity streaming. Consider a scenario where high-resolution audio streams seamlessly and without buffering, a development currently limited by bandwidth constraints. This will require both improvements in compression technology and the widespread adoption of higher bandwidth internet infrastructure.
Illustrative Examples
Let’s dive into some real-world scenarios to see how audio editing software can be used to improve audio quality and create unique sounds. We’ll explore enhancing a voice recording, crafting a sound effect, and visualizing a typical multitrack editing session.
These examples will highlight the versatility and power of audio editing software, showcasing how it’s used in various applications, from podcasting and music production to sound design for video games and film.
Enhancing a Voice Recording
Imagine you’ve recorded a podcast interview in a noisy coffee shop. The background chatter and hum of the espresso machine are distracting. To clean up the audio, you’d import the recording into your audio editor (like Audacity, GarageBand, or Adobe Audition). First, you might use noise reduction tools to identify and attenuate the consistent background noise. This often involves selecting a portion of the audio containing only the background noise and applying a noise reduction filter.
The software analyzes this sample and then reduces similar frequencies throughout the recording. Next, you’d likely employ compression to even out the dynamic range of the voice, making quieter parts louder and louder parts less jarring. Finally, a touch of equalization (EQ) might be used to boost the clarity of the voice frequencies and reduce muddiness in the lower frequencies.
The result? A much cleaner, more professional-sounding podcast episode ready for listeners.
Creating a Sound Effect
Let’s say you need a whooshing sound effect for a short film. You could, of course, find a pre-recorded one, but creating your own can be rewarding and allows for greater control. You might start by recording a simple sound – perhaps the sound of wind blowing through leaves or running water. Import this into your audio editor. Then, use tools like time stretching and pitch shifting to manipulate the recording.
Time stretching can make the sound longer or shorter, while pitch shifting changes the frequency. Combining these, you could create a dramatic, swooshing effect. You could also experiment with adding reverb to create a sense of space and distance. Finally, you might use a fade-in and fade-out to smooth the beginning and end of the effect, making it sound more natural within the context of the film.
The final product is a unique sound effect tailored to your specific needs.
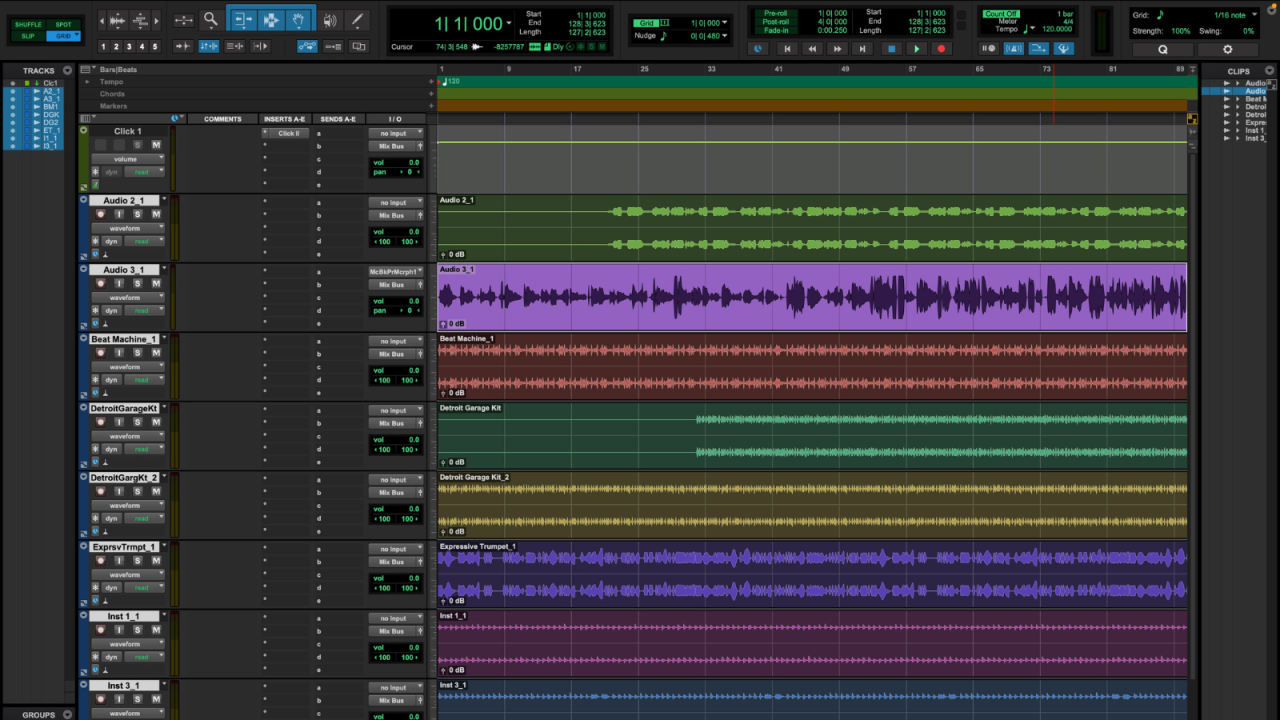
Visual Representation of a Multitrack Audio Editing Session
Imagine the screen of a Digital Audio Workstation (DAW). The interface is typically organized with a timeline running horizontally, representing the duration of the project. Vertical tracks stack on top of each other, each representing a different audio source. You might see a track for vocals, one for a bassline, another for drums, and even separate tracks for individual instruments within a drum kit (snare, kick, hi-hat, etc.).
Each track displays a waveform, a visual representation of the audio signal. The waveform’s amplitude shows the volume of the audio over time. Below the waveforms, you’ll find controls for each track: volume faders (vertical sliders to adjust volume), pan controls (to adjust the stereo placement of the sound), and various effects plugins (reverb, delay, EQ, compression, etc.) These plugins are often represented by small icons or names on the track.
In the top section, you’ll usually find the transport controls (play, stop, record, rewind, fast forward) along with the project’s overall settings. The entire visual layout is highly customizable, allowing users to tailor the workspace to their preferences and workflow. The scene shows a complex interplay of audio elements, all carefully arranged and manipulated to create a cohesive final product.
The visual representation itself provides an immediate understanding of the project’s structure and complexity.
Closing Summary
So, there you have it – a whirlwind tour through the exciting world of audio editing! From choosing the right software and hardware to mastering the art of noise reduction and applying effects, we’ve covered a lot of ground. Remember, mastering audio editing is a journey, not a race. Experiment, have fun, and don’t be afraid to dive into those advanced techniques.
The sonic possibilities are endless!
Top FAQs: Audio Editor
What’s the difference between linear and non-linear editing?
Linear editing is like working with tape – you physically cut and arrange segments. Non-linear editing uses software to manipulate audio digitally, allowing for more flexibility and revisions.
How much does audio editing software cost?
Prices vary wildly! You can find free, open-source options like Audacity, or invest in professional suites like Adobe Audition or Pro Tools, which can cost hundreds of dollars.
Do I need a powerful computer for audio editing?
It depends on the complexity of your projects. For basic tasks, a decent laptop will suffice. However, high-quality audio editing, especially with lots of plugins and large files, benefits greatly from a powerful CPU and ample RAM.
What are some common mistakes beginners make?
Clipping (distorting audio by exceeding the maximum volume), ignoring proper gain staging (setting appropriate input/output levels), and not using headphones for accurate monitoring are all common pitfalls.
Where can I find royalty-free music and sound effects?
Sites like FreeSound, YouTube Audio Library, and PremiumBeat offer a variety of royalty-free audio resources. Always double-check the license before using anything!